Ricing MacOS
Why...?
About a year ago, Youtube recommended a video titled "Improved AwesomeWM rice (With UI!) ", The minimal aesthetic and exaggerated animations got me hooked, and in a few hours, I got way too deep into the Unix Ricing rabbithole, exploring window managers, aesthetic CLI tools, and color themes.
Having witnessed the greatness of r/unixporn I felt empty, how could I experience the greatness of an OS tailor-made by me, for me, if I'm trapped in MacOS land? ... The same way one would in any other environment: With Google and a tiny bit of obsession.
Ok, but actually, why?
The goal with my setup is to have a digital space that reflects my philosophy on any workspace, physical or digital: Have simple tools, always at a hand's reach, but never in the way. And make it pretty enough that you're happy to come back to it every single day.
Aesthetics are cool and do play a role in driving my customizations, but the most impactful things in my rice are the ones that make using my tools better for me. Most of my favorite edits hide features away; Thanks to command palettes, either in the form of Raycast or one provided by the app itself, and keyboard shortcuts, I can always reach for what I need, when I need it.
Show me the MacOS Rice already!
Fine! First off, this is how my setup looks right now:
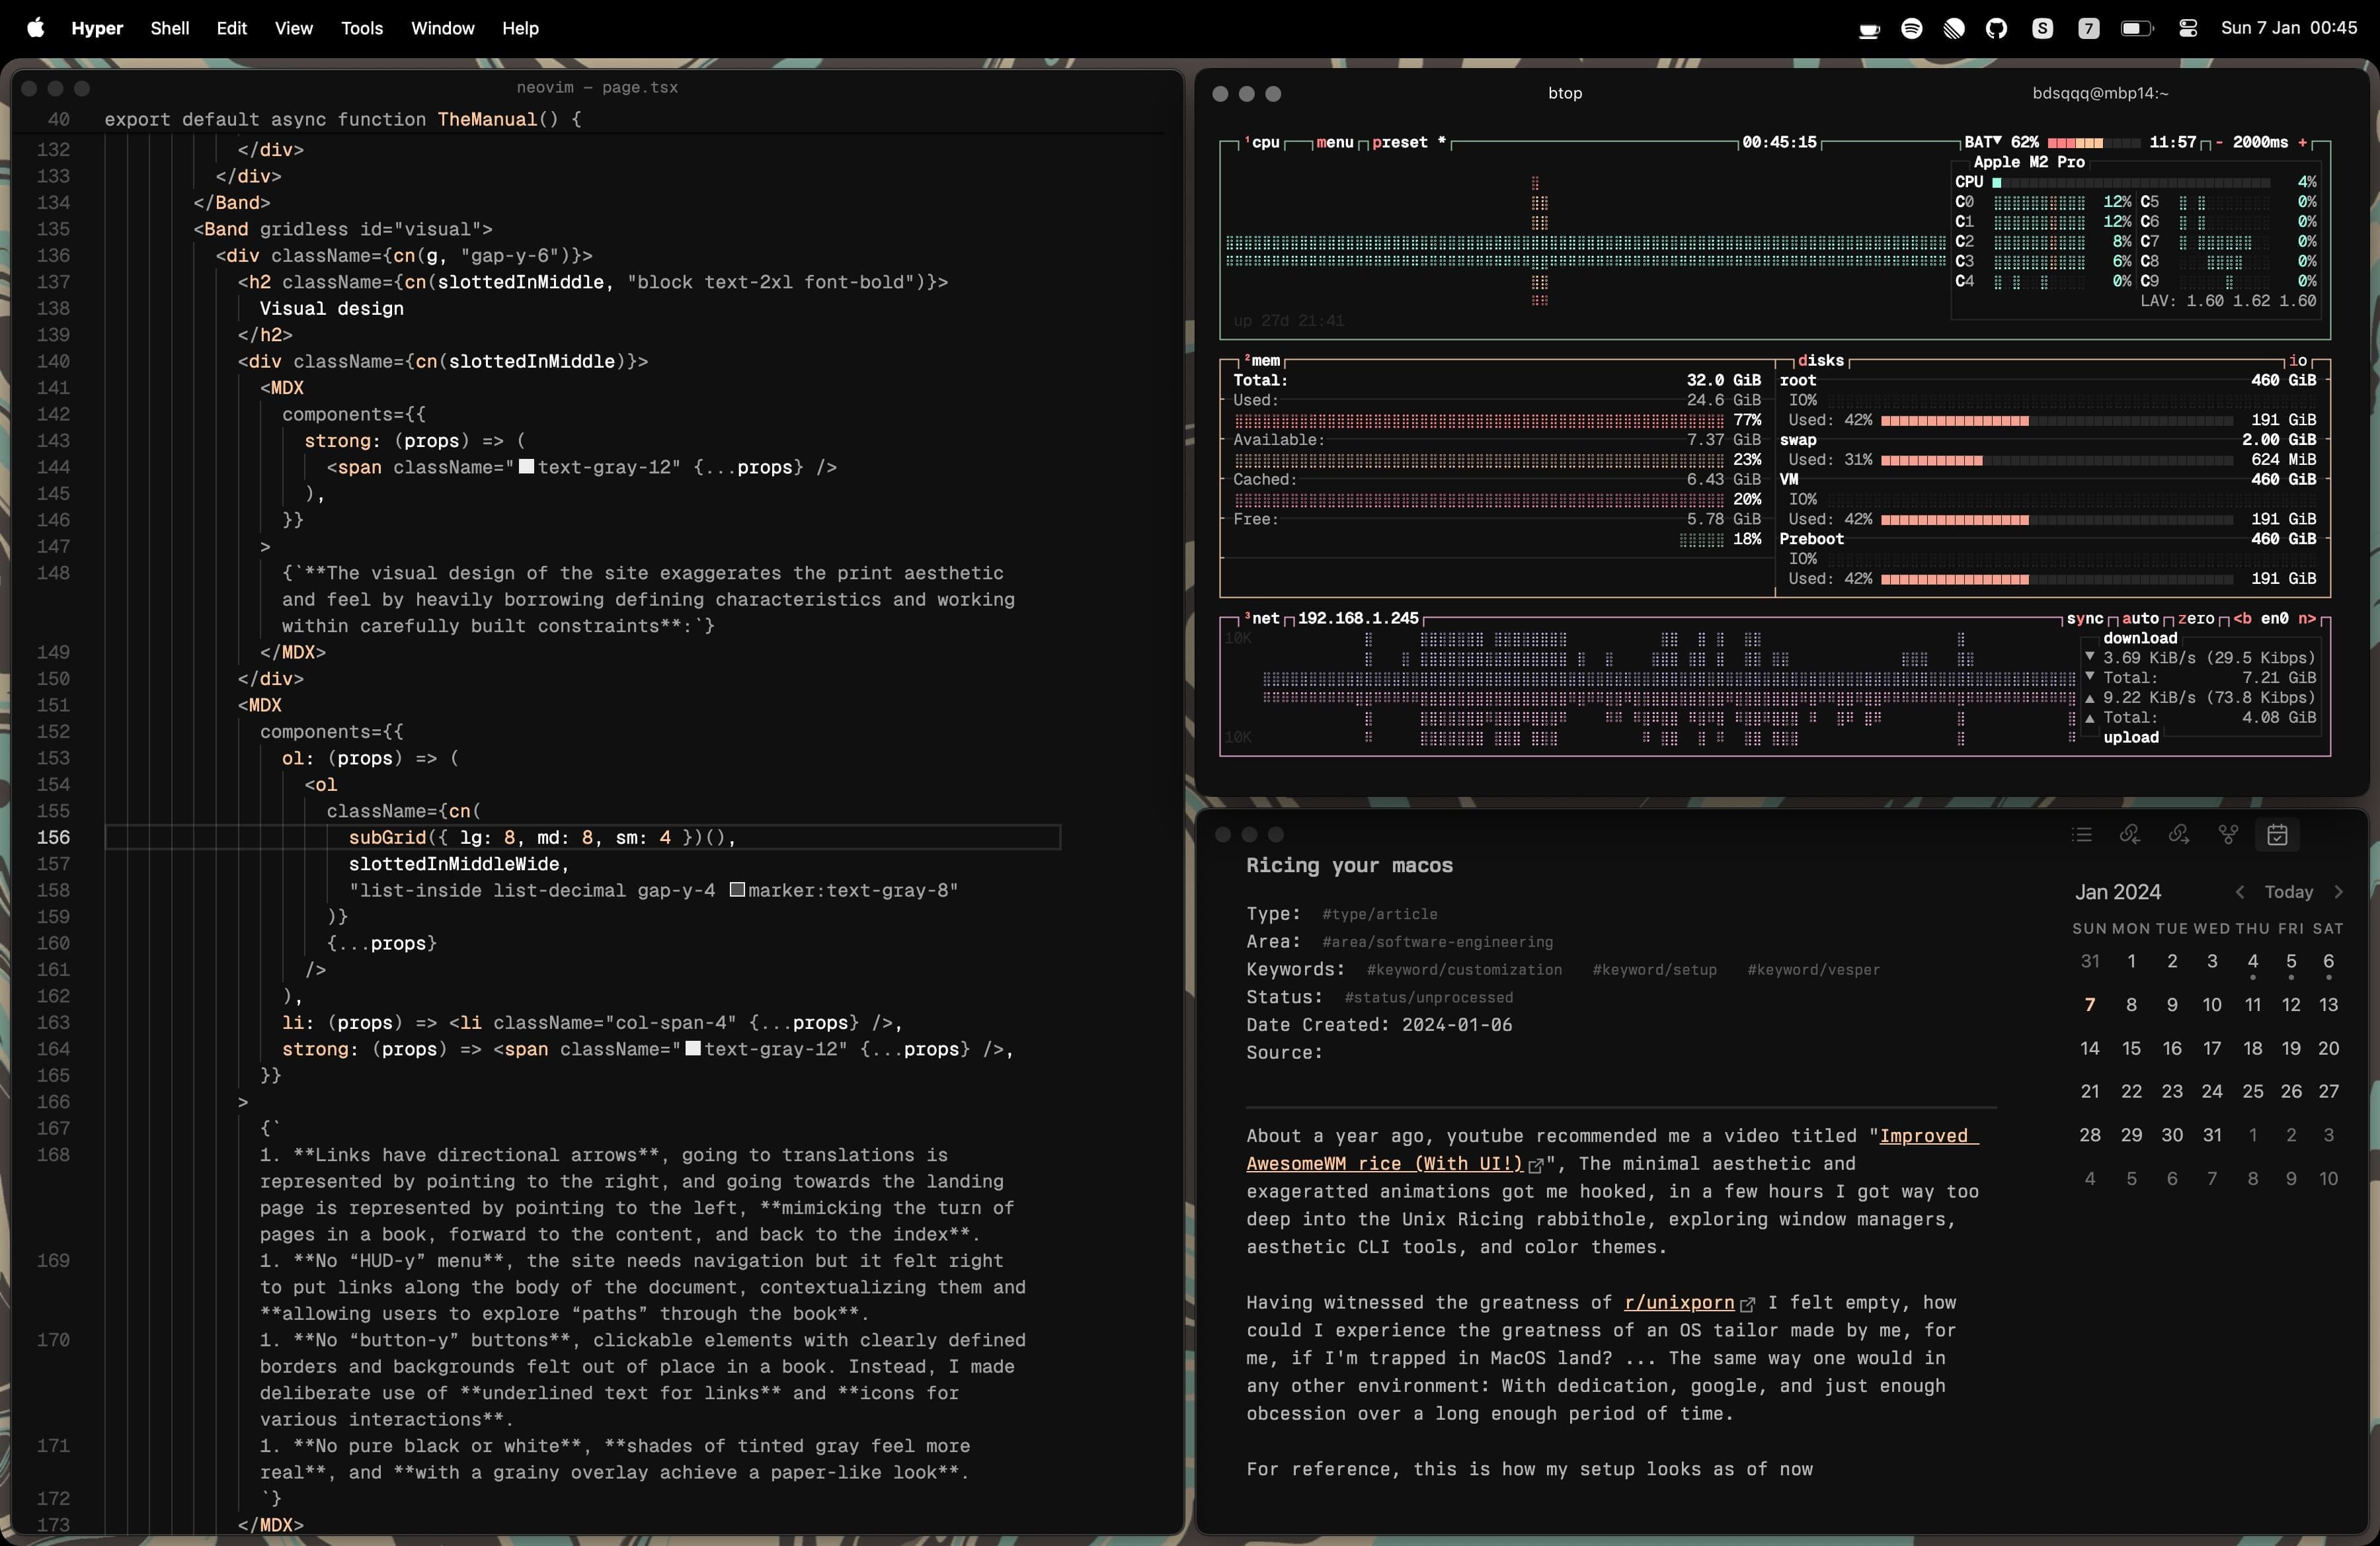
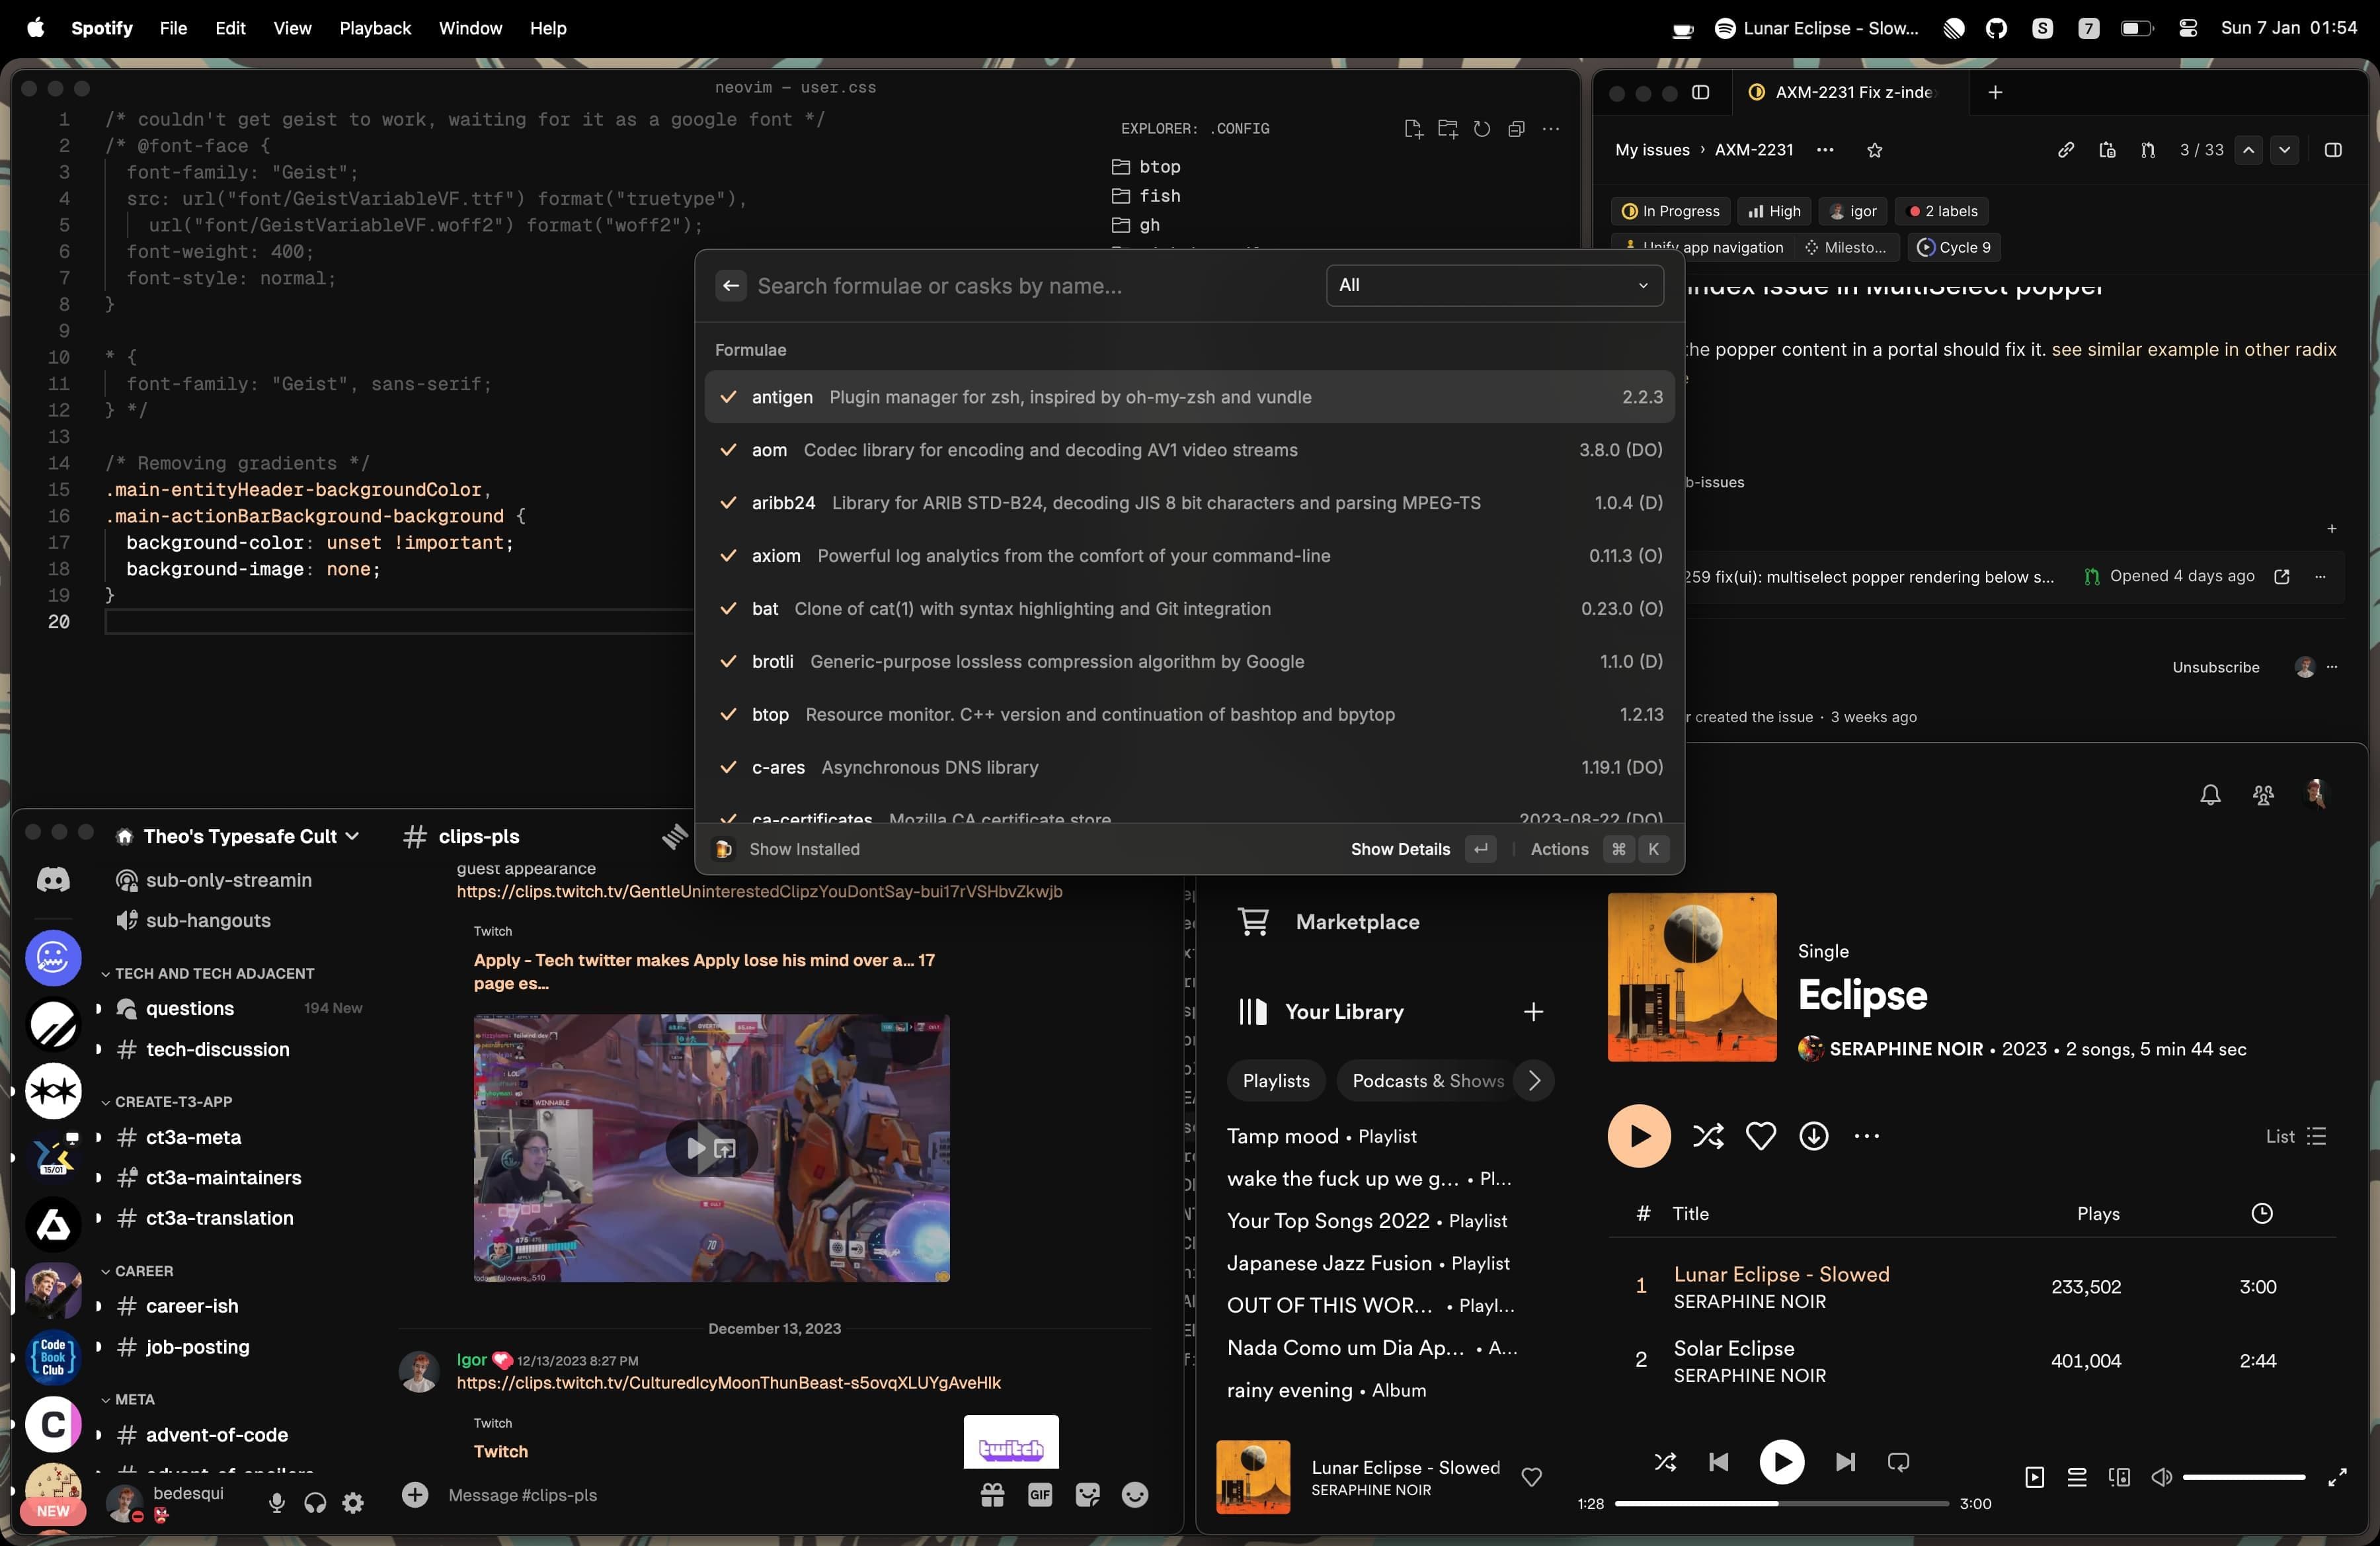
Most apps have the same custom color scheme, I tile windows through Raycast's Window Management Extension and have keybindings for about everything thanks to Raycast's Hotkeys .
I shared my progress on applying the custom theme to each app on Twitter bit by bit, and this week, 2 posts about my MacOS rice got over 360K impressions combined. With this many eyes on it, a few people asked for a guide on how to do it themselves, and it's surprisingly simpler than it seems.
How can I replicate it?
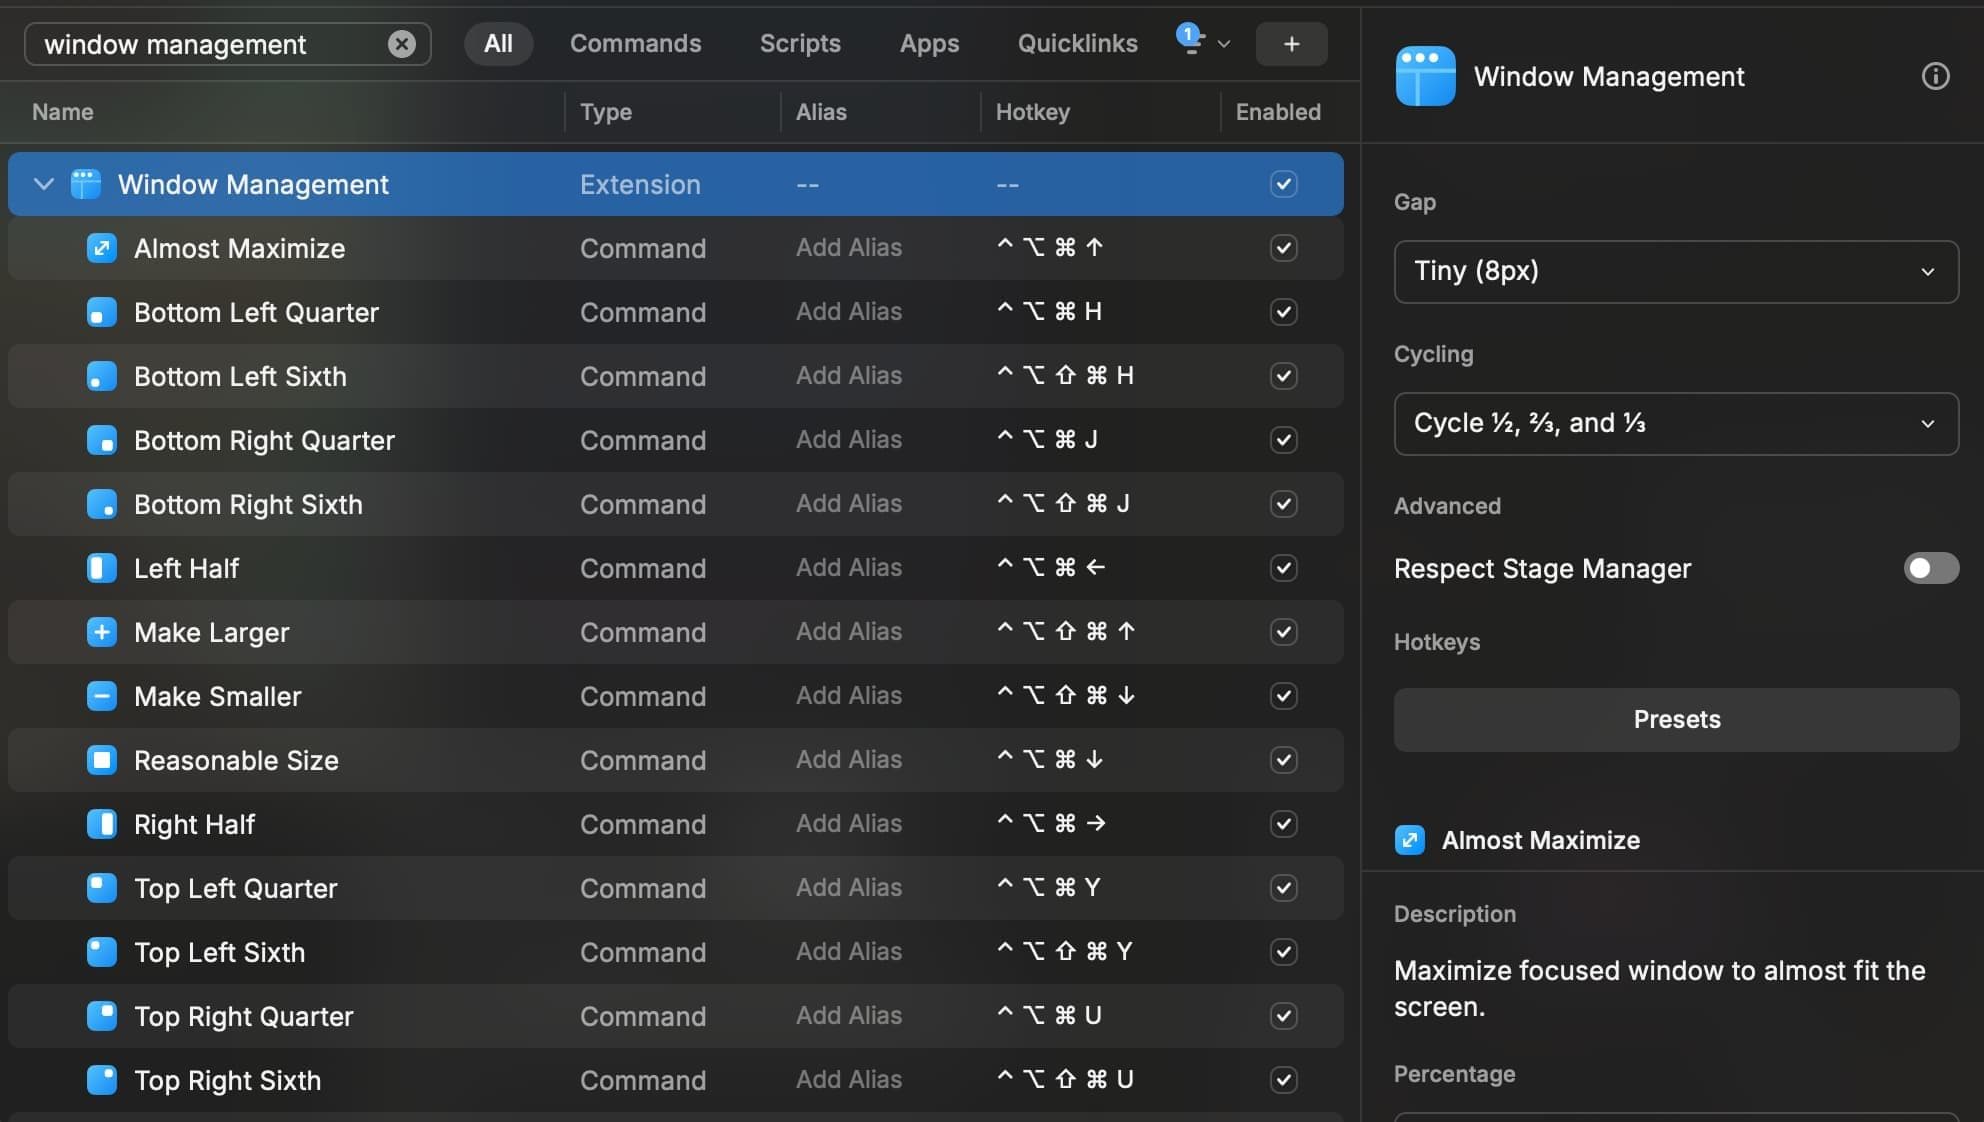
Window Management
The bulk of my rice consists of setting colors, but the most important part of my workflow is the window management aspect of it. Luckily it's simply leveraging Raycast's defaults with custom hotkeys for a few commands. If you don't have installed Raycast yet(Why?), you can get it by running brew install --cask raycast, or following the instructions on their site .
and you're pretty much done, the Window Management Extension has everything I use, and if you want my exact keybindings (and the aesthetic gap between windows), you can copy the following settings:
If you fancy a tiling window manager closer to what you'd find on Linux land, give yabai a try. And if you like snapping apps to the corners of screens like on Windows try Rectangle .
Apps
Customizing apps is a mixed bag, some like VSCode and most terminals allow extensive customization by default, others, like Spotify or Discord require the use of third-party modifications, and others, like Linear and Raycast allow for a bit of customization that often is just enough for me.
In no particular order, let's tackle how to customize each app:
VSCode
VSCode enables you to go DEEP with customizations, and this is a common trait of Applications made with Electron as we'll see later.
On the surface, picking a theme, and icon pack will do a lot of heavy lifting; My preferred combination is Vesper with Chalice icons . You can either install them from the VSCode Extension Marketplace or use the following commands:
For even more control, the Apc Customize UI++ extension enables you to apply styles to the app with no limits, if it's something the VSCode devs could do, you can do it. I use it to change the App font, making it the same as the editor, but see others do way crazier things. You can install it from the marketplace or run the following command:
going deeper, VSCode allows you to do extensive customizations through the settings.json file, to open it you can type "Open User Settings (JSON)" in your command palette. My current config is the following:
I commented on each section and left notes on what every config does. Mostly, I'm removing stuff! With the command palette and keybindings, I find the most value in the editor by coding with no clutter and then reaching for each tool as I need it.
Raycast
Raycast Pro gives you themes! To match VSCode I made two versions of Vesper for it, Vesper dark and Vesper dark only orange . The only orange version overrides ALL support colors with the accent orange from Vesper, I've been using it with no issues for a while, but hope your favorite extension doesn't rely on color alone to signify things!
Linear
Linear does such a delightful job at enabling color customization, in Settings, go to "Preferences", select the "Custom" Interface Theme option, and paste #101010,#FFFFFF,#101010,#A0A0A0,#FFC799,#000000 in the "All colors" field. Other than that I do collapse most of the sidebars and rely mostly on the cmd+k menu, but that's not exportable through a file.
Spotify
Spotify doesn't surface significant customization at all, but the Open Source does! Using Spicetify you can change anything in the Spotify UI. You can install it with the following commands:
For guidance on installation and usage, see the Spicetify Docs
Using the Spicetify CLI, you'll be able to apply a "Theme" to your Spotify, You can find my theme in the spicetify-vesper-theme Github repo. To use my theme, clone the repo into a folder in spicetify/Themes/ (mine is in ~/.config/spicetify/Themes/Vesper), and update the "current_theme" Setting in /spicetify/config-xpui.ini.
Discord
Similar to Spotify, my Discord setup requires a third-party application, Better Discord enables extensive customization through CSS, similar to the aforementioned APC extension for VSCode. For installation guidance, see the Better Discord documentation .
You can find my theme in the better-discord-vesper-theme Github repo. To use my theme, copy the content of the repo into the BetterDiscord/themes folder, you can open it from the Discord UI in Settings > Better Discord > Themes > "Open Themes Folder" after setting up Better Discord.
Terminal
The cool thing about terminals is that themes are often very portable, I daily drive HyperTerm because Alacritty didn't let me use different padding from the top and bottom of the window. As you might've learned from previous items, electron-based things are great for customization.
For my colors, I use some Vesper colors on top of the Mellow nvim theme :
If you use the Warp terminal , you can get the theme straight from my Github repo . And if you use the default MacOS terminal the simple version that changes the background, text color, and caret color in this gist might be enough to the the right look.
I also use Fig for autocomplete in the terminal, the theme for it is available in my fork of the Fig themes repo (and come on Fig maintainers, it has been 5 months since I made the PR to include Vesper in the default themes ).
Obsidian
In Obsidian, I use the Simple Theme with a couple of overrides using the Style Settings plugin.
You can get my overrides by copying the following JSON into the Settings > Community Plugins > Style Settings > "Import" field.
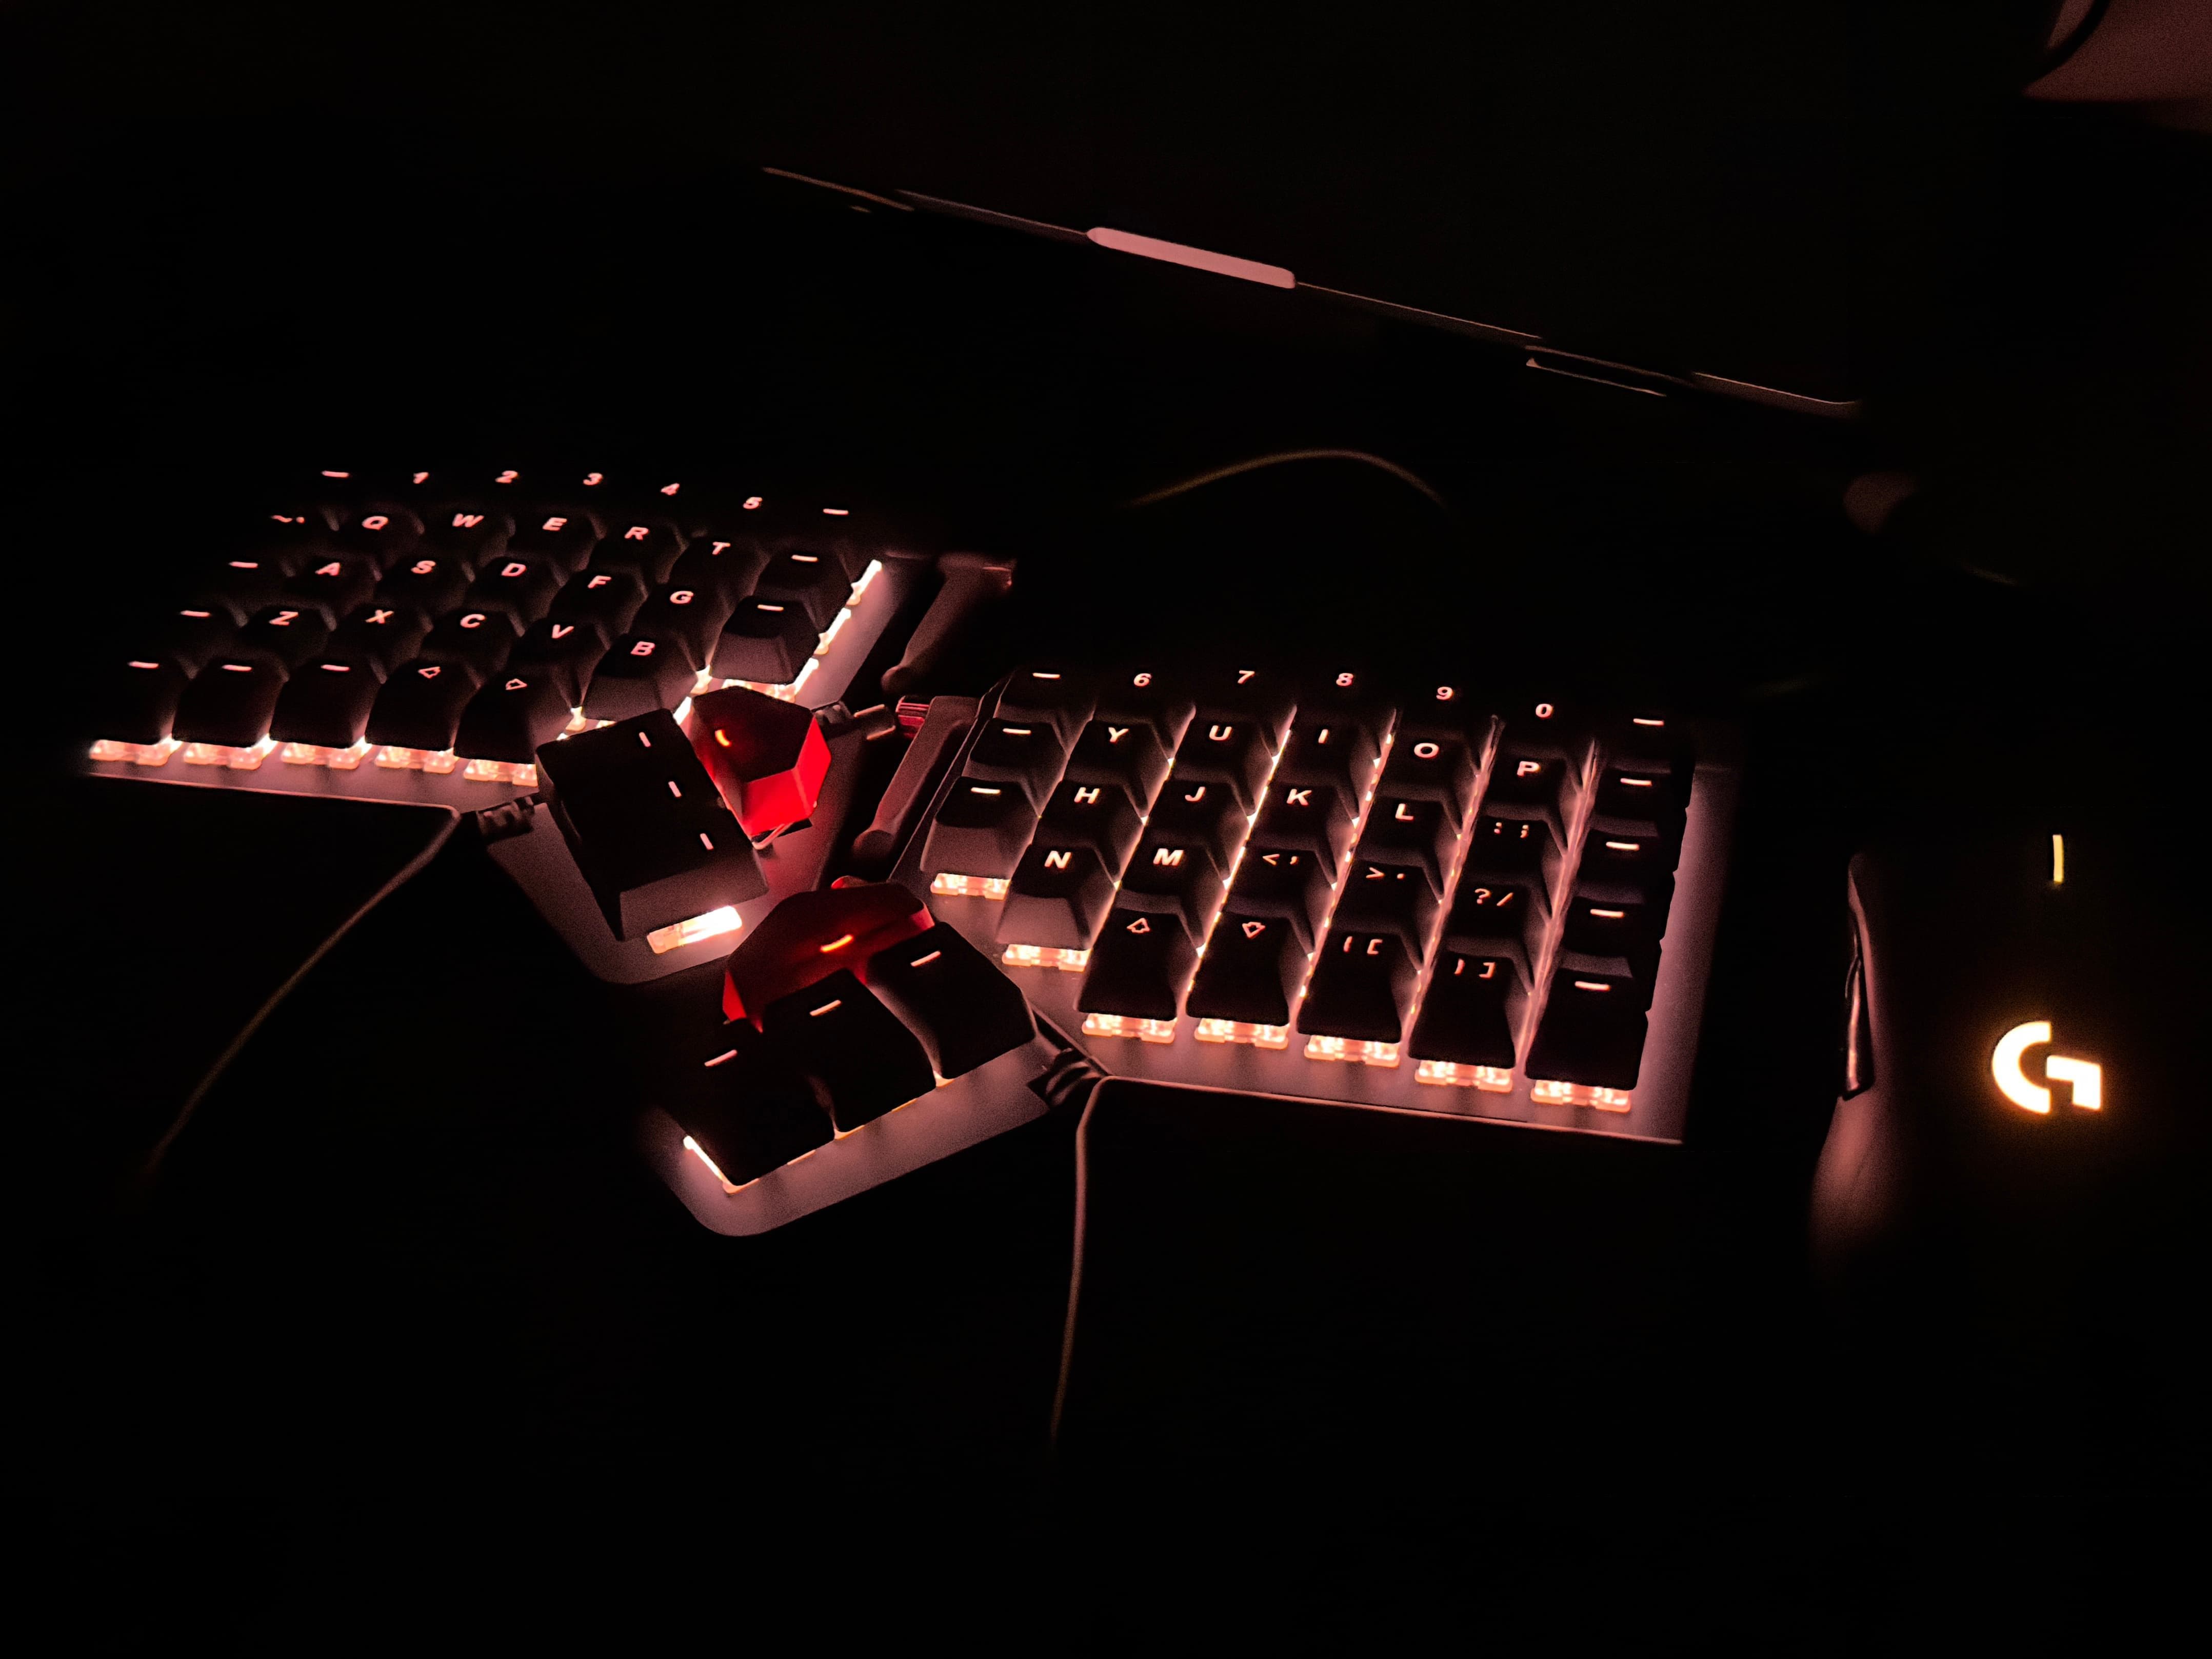
Physical setup??
Ah, and the Vesper mania wouldn't be complete if I didn't make the LEDs in my keyboard and mouse match the orange(or white sometimes; black and white are too nice to pass).
Afterword
While writting this, I realized how much care went into my rice. It was a gradual process that spanned several months, so I didn't even notice the extent of the work. I hope this inspires you to personalize your workspace. Wether by overfocussing on silly colors or diligently organizing and minimizing clutter. The most important part is crafting something yourself, for yourself.